Assignments > HW4. PhotoApp: Client-Side Templating with JavaScript
Due on Fri, 05/20 @ 11:59PM. 40 Points.
Update (Monday, 5/16 @8:30PM)
I just made a (pretty rough) video that may or may not be helpful.
Keep in mind that you should feel free to do it your way. And this is certainly not a production quality video, so forgive the meandering (long day :).
1. Introduction
In this assignment, you will be exploring an alternate strategy for creating front-end interfaces. Specifically, instead of rendering your HTML code on the server-side (using Jinja and Flask), you will be asking your Browser to build your UI for you using JavaScript. Within this design paradigm, the browser will load a very simple HTML “skeleton,” and then execute some “client-side” JavaScript (that you will write) to build the DOM.
You will also be implementing some event handlers to interact with the REST API that you made – in order to like, bookmark, and comment on posts; and to follow new users. And finally, you’ll continue your work to ensure that your interface is accessible.
A few notes and guidelines
- You will be working on the follow / unfollow functionality during Lab 7 this week.
- You will be working on some of the “post” and “modal” functionality in class during the week of 5/9. Please come to class with your files set up because it will be easier to follow along.
- HW4 assignment is designed to take approximately 5-10 hours (depending on your level of experience). We encourage you to do a little at a time during class and in lab, so that you have enough time to engage with the concepts and complete the exercises without intense stress at the end.
- You may NOT use any outside CSS or JavaScript libraries (other than Font Awesome). Everything should be done by writing your own “vanilla” HTML, CSS, and JavaScript.
2. Set Up
Please make the following changes to your code to get ready to make your client-side web interface:
1. Configure your local git repo
- On your terminal or command line, navigate to your photo-app folder.
- Make sure that
hw03is still your active branch by typinggit branch. - Next, create a branch called hw04 as follows:
git checkout -b hw04. Since you created yourhw04branch from yourhw03branch, yourhw04branch should be currently be identical to yourhw03branch. - Type
git branchto ensure that you are indeed on thehw04branch (it should be green with an asterik next to it). - Push your hw04 branch to GitHub as follows:
git push -u origin hw04 - Open GitHub in your web browser and verify that your hw04 branch is there.
2. Integrate the new files
Download hw04.zip and unzip it.
You should see a directory structure that looks like this:
├── app.py
├── models
│   └── comment.py
├── static
│   ├── css
│   │   └── starter-client.css
│   └── js
│       └── hw04.js
└── templates
    ├── includes
    │   └── navbar.html
    └── starter-client.html
Please integrate the starter files as follows:
- Replace
photo-app/models/comment.pyfile withhw04/models/comment.py(minor bugfix). - Replace
photo-app/app.pyfile withhw04/app.py. - Copy the
cssandjsfolders fromhw04/staticintophoto-app/static. - Copy the
includesandstarter-client.htmlfromhw04/templatesintophoto-app/templates.
3. Update the views/post.py View (Read Carefully)
Please update both of your get methods in the views/post.py file by passing self.current_user as an argument to the post’s to_dict() method (see code below):
PostListEndpoint
def get(self):
    # your code above
    ...
    # updated to_dict method call:
    data = [
        post.to_dict(user=self.current_user) for post in posts
    ]
    return Response(json.dumps(data), mimetype="application/json", status=200)
PostDetailEndpoint
def get(self):
    # your code above
    ...
    # updated to_dict method call:
    return Response(json.dumps(post.to_dict(user=self.current_user)), mimetype="application/json", status=200)
By making this change to the Post object’s to_dict() method, the Post JSON object will include two new entries:
current_user_like_id: The id of theLikePostobject associated with the current user. This entry will only be included if the current user has liked the post.current_user_bookmark_id: The id of theBookmarkobject associated with the current user. This entry will only be included if the current user has bookmarked the post.
4. Verify Your Installation
Navigate to photo-app on your command line, and run flask (flask run). You should see the following screens when navigating to the following two pages (respectively):
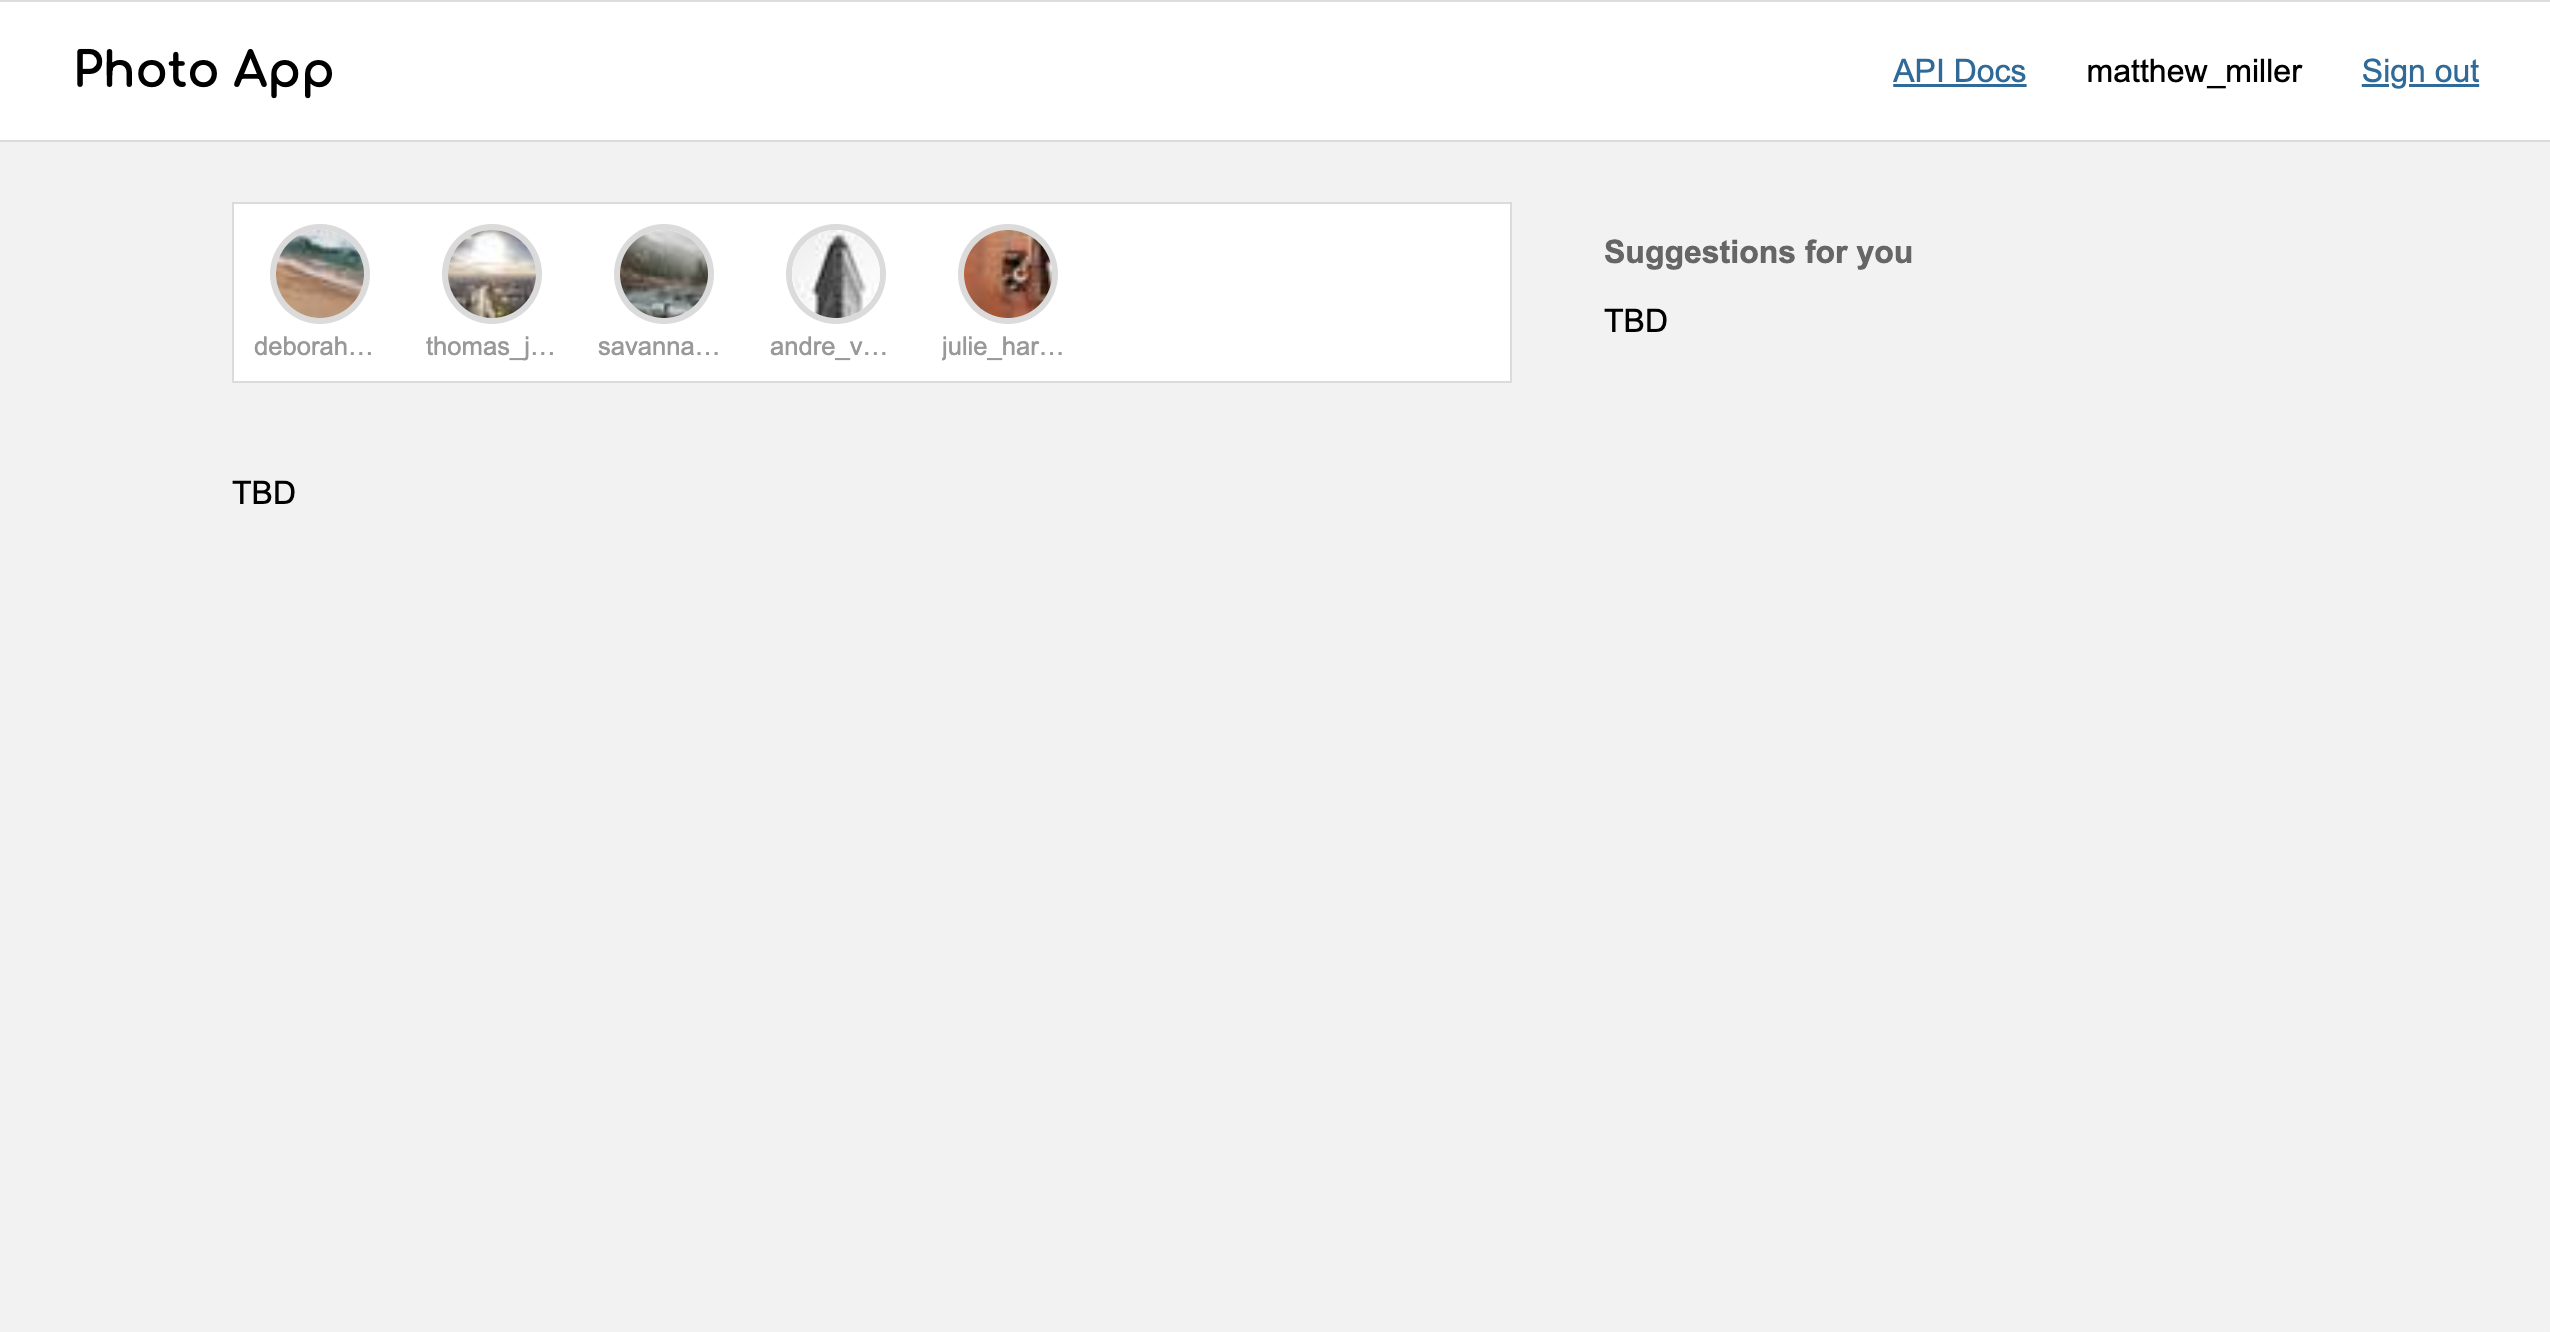
Homepage:
This is the page you will be modifying for this homework:
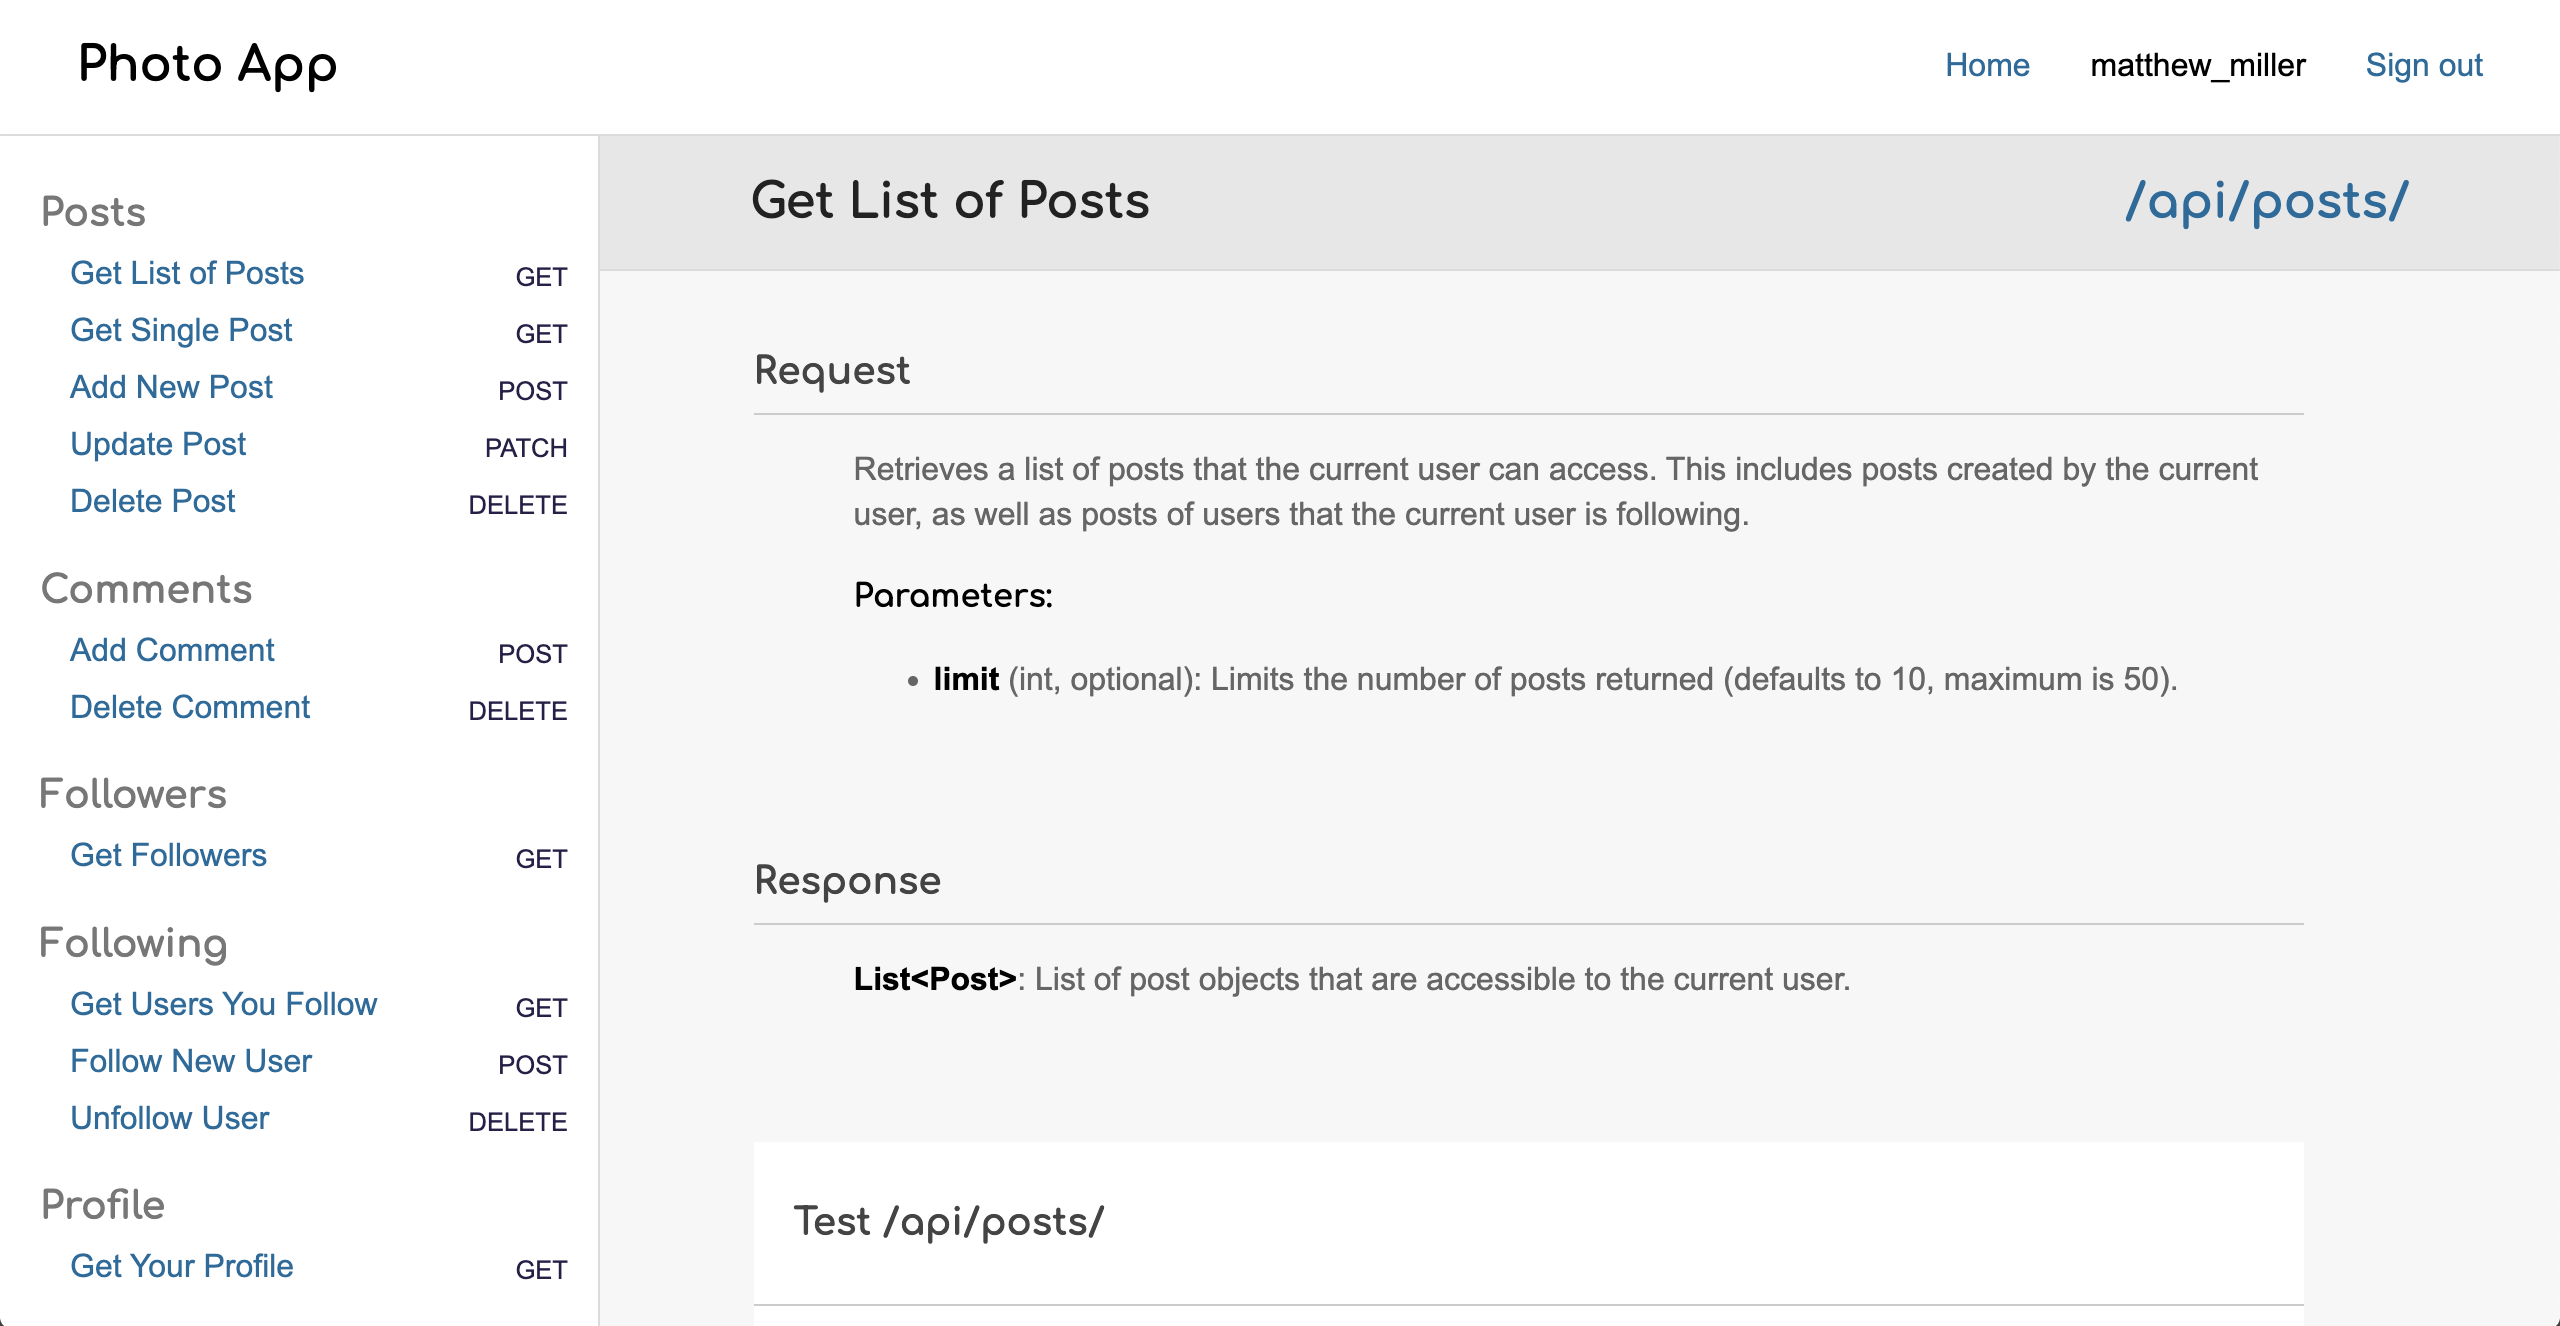
API Tester:
This page may help you formulate your fetch requests using JavaScript:
In addition, your API Endpoints (from HW3) should all still work.
4. Tips
While we’ve provided some starter HTML and CSS…
templates/starter-client.htmlstatic/css/starter-client.cssstatic/js/hw04.js
…you are encouraged to use the HTML and CSS that you made in HW1 & HW2. If the starter code doesn’t help, feel free to do it your way.
3. Your Tasks
Working Demo
If you want to see a working demo of the completed HW4 interface (ignore the login screen), take a look here (username: webdev, password: password)
Please complete the following tasks by making modifications to:
templates/starter-client.htmlstatic/css/starter-client.cssstatic/js/hw04.js
You’re more than welcome to add more CSS & JS files as needed (though this is not necessary).
1. Page Initialization Tasks (8 Points)
The functionality in this section must be invoked when the page first loads (so that the user sees each of these panels right away).
| Points | Task | Description | Figure |
|---|---|---|---|
| 0pts | Stories Panel |
ALREADY DONE FOR YOU. Render an HTML representation of stories from the user's network using data from the /api/stories endpoint.
|
Figure 4 |
| 1pt | Right Panel: User Profile |
Inside of the right panel at the top, render an HTML representation of the current user's profile using data from the /api/profile endpoint.
|
Figure 2 |
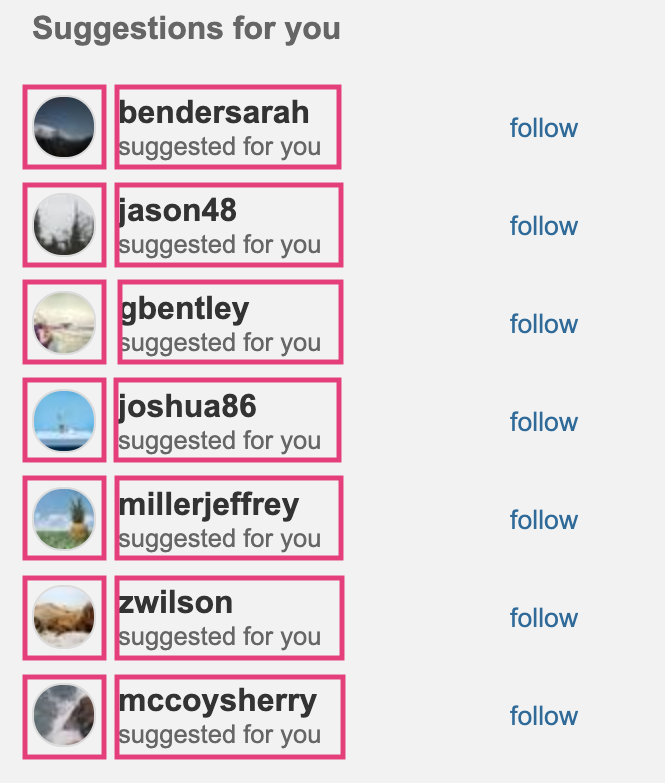
| 2pts | Right Panel: Suggested Accounts |
Inside of the right panel (underneath the user profile), render an HTML representation of suggested user accounts using data from the /api/suggestions endpoint.
|
Figure 3 |
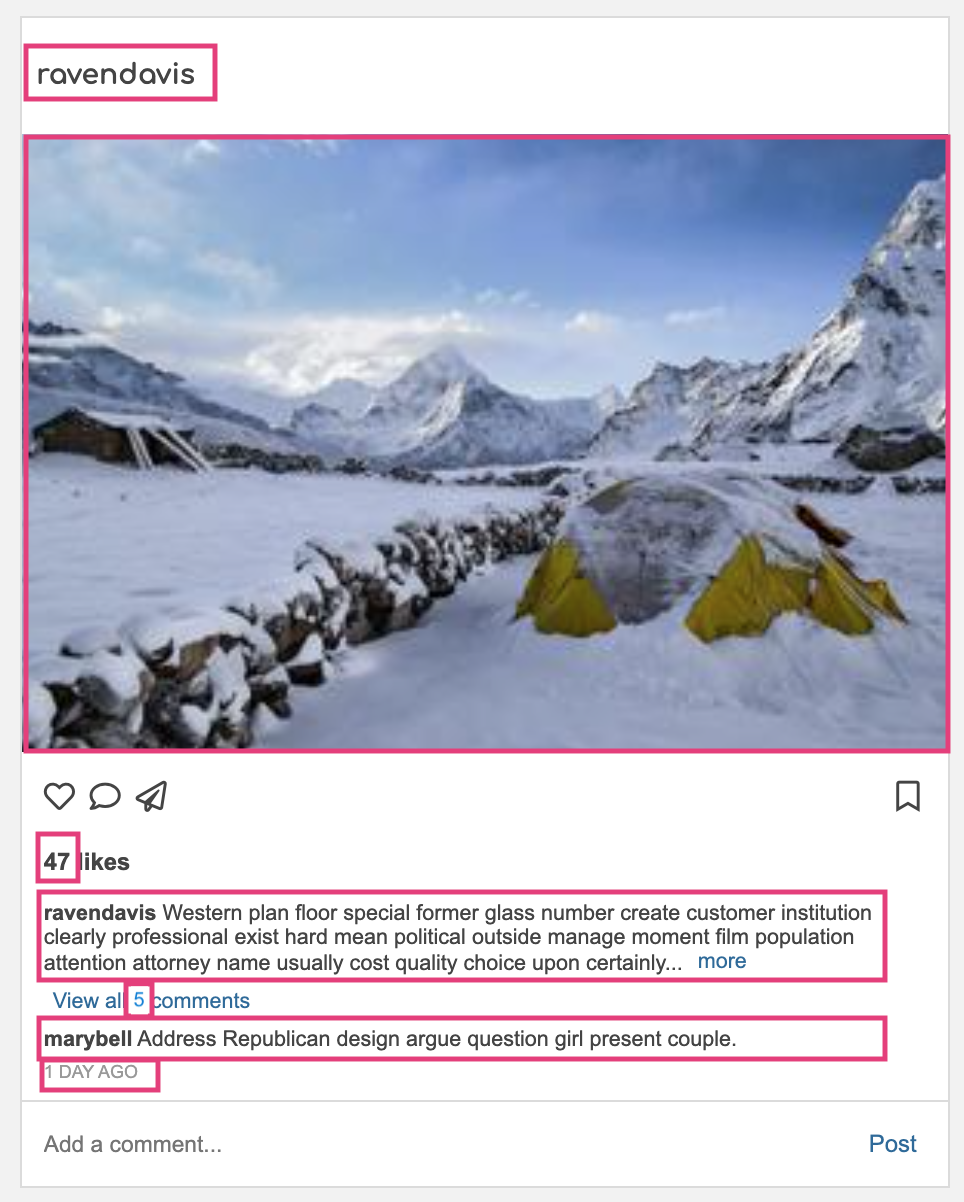
| 5pts | Posts Panel |
Underneath the stories panel, renter an HTML representation of the first 10 posts from the user's network using data from the /api/posts endpoint. Please ensure that the following rules are honored:
|
Figure 5 |
Note that the content from each box should be generated from the API data (no hard-coding).


2. Create / Delete Data with Event Handlers (15 Points)
| Points | Task | Description | Figure |
|---|---|---|---|
| 2pts | Like Post |
|
Figure 6 |
| 2pts | Unlike Post |
|
Figure 6 |
| 2pts | Bookmark Post |
|
Figure 7 |
| 2pts | Unbookmark Post |
|
Figure 7 |
| 2pts | Follow Account |
|
Figure 8 |
| 2pts | Unfollow Account |
|
Figure 8 |
| 3pt | Add a Comment |
|
Figure 9 |
Note that each button click is issuing a request to your API and redrawing the screen (console messages just used for demonstration purposes).
Note that each button click is issuing a request to your API and redrawing the screen (console messages just used for demonstration purposes).
Note that each button click is issuing a request to your API and redrawing the screen (console messages just used for demonstration purposes).
Note that each button click is issuing a request to your API and redrawing the screen (console messages just used for demonstration purposes).

3. Post Detail Modal (5 Points)
Finally, you will make a modal window that displays a more detailed representation of the post.
| Points | Task | Description |
|---|---|---|
| 2pts | "View all X comments" Button Click |
|
| 2pts | Modal Body |
|
| 1pt | Close Button Click |
|
Note: in this example, the picture changes because of the way that picsum.photos works. Just ignore that for now.
4. Accessibility Features (6 points)
Accessibility can be tricky when you’re relying on the fetch API, because a screen reader doesn’t always know that content has changed on the page. In addition, you don’t want to be over-reliant on the mouse. Please take a look at the Accessibility Resources, and specifically the resources pertaining to aria roles and attributes.
| Points | Task | Description |
|---|---|---|
| 2pts | Keyboard Navigation |
|
| 2pts | Aria attributes |
Use the 'aria-label' and 'aria-checked' attributes to indicate to the screen reader whether the following buttons are turned on or off:
|
| 2pts | Modal Box (Post Detail) |
Please ensure that the following accessibility features have been implemented. See lecture 14 code samples and this online resource
|
5. Accessibility Reflection (3 Points)
- In a brief reflective response (about 4-8 sentences total), please consider the following questions:
- Why, and to whom, is accessibility important?
- How might you make a site (or app) like Instagram more accessible?
- What resources did you consult as you implemented the accessibility features? Were there any that you found useful that aren’t on the Accessibility Resources page?
- Reflect on the work that went into making your website accessible.
- Was it a lot of additional work?
- What was the most challenging part?
- Do you think that designing for accessibility also improves the usability of the site for all users? Why or why not?
6. Deploy to Heroku (1 Point)
Please commit all of your changes / additional files to git.
When you’re done, create a NEW Heroku app for your hw04 branch. You will follow the same process as you did for the HW3 Heroku deployment, with two differences:
- Instead of creating a brand new Heroku Postgres database, just use the same
DB_URLenvironment variable that you used in HW3. In other words, your HW3 and HW4 Heroku deployments will share a database. - Make sure you push your
hw04branch to Heroku:git push heroku hw04:main
4. What to Turn In
Please review the requirements above and ensure you have met them. Specifically:
| Points | Category |
|---|---|
| 8 points | Page initialization |
| 15 points | POST / DELETE functionality |
| 5 points | post detail modal |
| 6 points | Accessibility features |
| 3 points | Accessibility reflection |
| 1 point | Heroku deployment |
| 2 points | Composition and CSS (the UI looks like the screenshots provided) |
Canvas Submission
When you’re done, please submit the following to Canvas:
- A zip file of your code
- A comment that includes the following:
- A link to your Heroku app
- Your responses to the accessibility questions
- The name of your partner (if applicable)