Assignments > Lab 9. Mini Chat App
Due on Fri, 05/27 @ 11:59PM. 5 Points.
Credits & Kudos:
- Cooper Barth wrote the original WebSockets lab using Node.js
- Victoria Chávez designed the accessibility features
- Sarah adapted it to work with Python
Updates
If you can’t get your local chat server working, use the course chat server, which can be accessed here: wss://chat-server-cs396.herokuapp.com
Background Readings
- WebSockets for fun and profit (a nice, concise overview)
- A conceptual overview of WebSockets (a longer, more detailed overview)
- The websockets library (Python)
- Demo using websockets and Python
- Using Aria Live Regions
- Assertive clears queue
- Mac Screenreader bugs
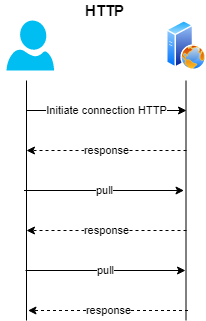
Until now, we’ve been using the HTTP protocol to send messages between a user’s client at the server. Using HTTP, clients must initiate individual connections to the server in order to request and receive data.
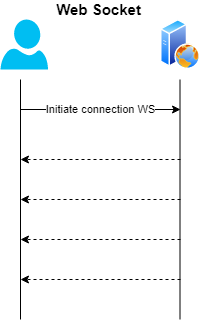
However, there are examples in which it may be useful for the server to send data to the client without the client explicitly requesting it. WebSockets are useful for these cases, since each client establishes a persistent connection to the server over which the server can send messages.
HTTP Protocol (http:// or https://) |
Web Socket Protocol (ws:// or wss://) |
Today, you will building a messaging app using WebSockets. This requires two components:
- A WebSocket server that handles incoming messages from each client
- A client that establishes a connection to the server and sends messages to the server whenever a user chats.
Note that the server and the client don’t have to be on the same machine (and furthermore the client doesn’t even have to be hosted in the cloud)!
1. Setup Your Files and Local Server
1. Organize files
- Download the
lab09.zipfile and unzip it. You should see the following files:
lab09
├── client
│   ├── client.js
│   ├── index.css
│   └── index.html
└── server
    ├── .env
    ├── Procfile
    ├── app.py
    └── requirements.txt
2. Set Up Your Virtual Environment
Open the terminal and navigate to the server directory inside your lab09 directory. Then, set up a virtual environment and install the dependencies as follows (depending on your operating system):
For Mac, Unix, Linux, or GitBash
python3 -m venv env
source env/bin/activate
python -m pip install -r requirements.txt    # install dependencies
For Windows Powershell or Command Prompt
# create the virtual environment
py -m venv env

# run the activate.bat script as follows:
env\Scripts\activate

# and finally, install the Python dependencies
py -m pip install -r requirements.txt
3. Run Your Server
Note that this IS NOT a Flask server. Given this:
- You will run the server as a regular python file (with your virtual environment activated):
python app.py - Each time you make a change to
app.pyyou will have to restart the server.
2. Implement the Server Functionality
Before implementing anything, take stock of the code. First, open server/app.py in VS Code and take a look at it. A few things to note:
- This server isn’t using flask. Rather, it’s using the
websocketsthird-party library to listen for websocket requests. - The
respond_to_messagefunction naively echos a message back to the originating client. - The server doesn’t keep track of all of the websockets that are connected to it. Therefore, it does not know how to broadcast a user’s message to all of the other socket connections.
async def respond_to_message(websocket, message):
    data = json.loads(message)
    print(data)
    websocket.send(json.dumps(data))
Your job is to edit the app.py code to handle the three different types of JSON messages shown below. These data formats are abitrary – we just made them up as reasonable ways to send login, disconnect, and chat information. You could set these messages up however you want, but we just made some decisions here about how to do things:
- Login:
{ "type": "login", "user_joined": "walter", "active_users": ["walter", "maria", "laura"] } - Disconnect:
{ "type": "login", "user_left": "walter", "active_users": ["maria", "laura"] } - Chat:
{ "type": "chat", "text": "is this working?", "username": "my_username" }
You will handle each of these messages according to the specifications outlined below:
1. Login
If data.get('type') is “login”, add the socket and the logged in user to the logged_in_users dictionary:
logged_in_users[websocket] = data.get('username')
Then, send the following message back to each client:
{
    "type": "login",
    "user_joined": data.get('username'),
    "active_users": list(logged_in_users.values())
}
You can test this by opening lab09/client/index.html in your web browser, clicking the “Connect” and “Set Name” buttons (and also providing a username), and seeing if you get the correct JSON output in the browser console.
2. Disconnect
If the data.type is “disconnect”, removed the user from the logged_in_users dictionary.
del logged_in_users[websocket]
Then, send the following message back to each client:
{
    "type": "disconnect",
    "user_left": data.get('username'),
    "active_users": list(logged_in_users.values())
}
You can test this by opening lab09/client/index.html in a second browser tab and clicking the “Connect” and “Set Name” buttons (and also providing a username). Then, close the browser tab you just opened. Now go back to your first browser tab and look at the console. You should see a messages in the console indicating that a user both connected and then disconnected from the chat server.
3. Chat
If the data.get('type') is “chat”, just send the data object to each client (no processing needed). You can test this by sending a chat message in the client and then seeing if you get the correct JSON output in the browser console.
If the data.get('type') isn’t “login,” “disconnect,” or “message”, ignore the message (don’t pass it on), and log it to the console: console.log('Unrecognized message type:', data);
Relaying the message to everyone
Finally, you will write code that will iterate through the tracked websockets from the logged_in_users and broadcast the received message to all of the connected clients:
for sock in logged_in_users:
    # Be sure to replace "data" with a message that conforms to
    # the specs above:
    await sock.send(json.dumps(data))
Some notes on extending this exercise
If we were building this into a full application, we would (probably) store each user, conversation, and message in a database to load the appropriate chat history whenever the user opens the application. For now, messages will just be stored on the client and not be persisted between sessions (perhaps a privacy feature?).
We would also probably require that the user authenticates using a JWT token, and that a user could only broadcast messages to people with reciprocal following relationships (you follow me and I follow you).
3. Implement the Client Functionality
Open index.html in your browser. The interface is a simple chat interface that allows the user to select a chatroom (just localhost for now), set their name, and send messages to other users in the chatroom.
Now open client.js in VS Code and take a look at it. Much of this (simple) client has already been implemented for you, including:
- Code for setting up the web socket + socket event listeners (when the user clicks the “Connect” button).
- Code for sending messages to the server (responding to UI events).
- Code for listening for and responding to (some) DOM events.
- Code for handling UI changes (i.e., showing and hiding DOM elements).
- An event handler (function) stub called
handleServerMessagethat you will implement.
Your job will be to implement the handleServerMessage event handler, which will update the UI whenever the client receives a message from the server. You will handle server messages according to the specifications outlined below:
1. Login or Disconnect
If the data.type is “login” or “disconnect”, display the list of logged in users in the #users-list div (right-hand panel).
2. Chat
If data.type is “chat”, append the chat message to the #chat div (main panel) with the sender’s name and message. Use the “left” and “right” classes to differentiate the current user from all the other users.
If your client and server are both working, you should be able to open index.html in two separate browser tabs, log in to the same server on each, and send messages between them (see video below)!
4. Accessibility
It is important to think about how low-vision or blind users might interact with a chat app. Specifically:
- New chat messages are inserted into the DOM anytime another user sends a message.
- New users are coming and going all of the time.
Given this, please ensure that all of the regions that are updated when websocket messages are received use the aria-live and role attributes. Read more on live regions here.
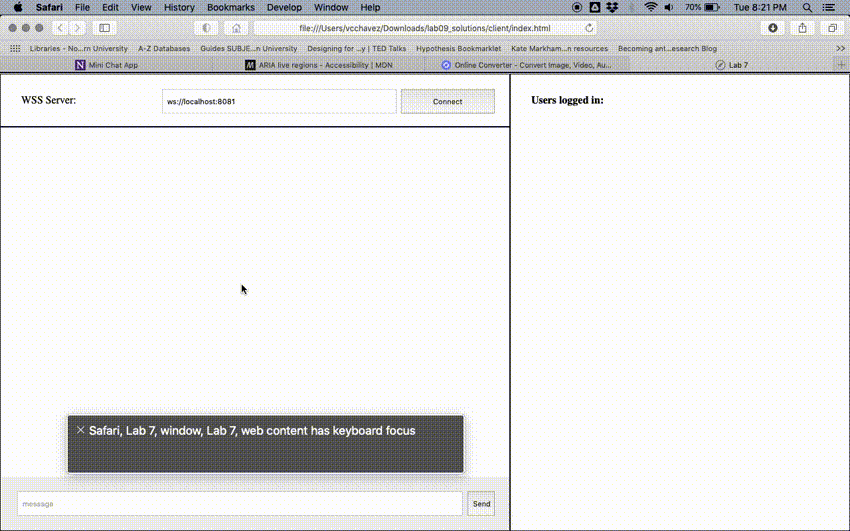
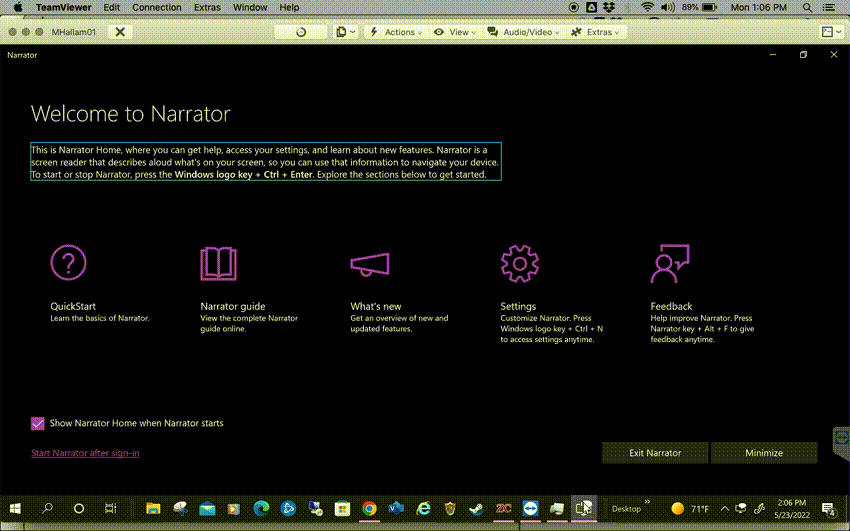
Both Apple and Windows machines have a pre-installed screenreader. Use VoiceOver on Mac or Narrator on Windows to test the behavior described above (see instructions below).
Screen Reader Demo
Here is an example of how a screen reader might interact with your chat interface (turn on the volume):
Mac VoiceOver Instructions
Turn on VoiceOver
Open System Preferences, go to Accessibility, and enable VoiceOver
Turn off VoiceOver
Click the X on the top left of the gray VoiceOver transcription box
Windows Narrator Instructions
Turn on Narrator
Open the Start menu, search for Narrator, enable and do not close the Narrator window
Turn off Narrator
Pull up the Narrator window and click Exit Narrator. If you’ve closed this window, press the Windows logo key + Ctrl + Enter on your keyboard. In earlier versions of Windows, you may need to press Windows logo key + Enter.
5. (Optional) Experiment with ngrok
Ngrok is a command line tool for creating a secure URL that points to server that is running on your local computer. Using this url, others can access your server securely without you having to host it online.
You should sign up for ngrok using your Northwestern email and download/extract the version for your preferred OS.
Run ngrok help; if the command fails, find the location where the ngrok executable was downloaded to and add the folder to your system PATH. Then, run ngrok authtoken <token> with the token listed in your ngrok dashboard.

With your server running in another terminal window, type ngrok http 8081 to open a tunnel to your server. You should now be able to add the forwarding url (minus the http://) to the list of servers on your client and use it as a separate chat room.
What to Turn In
When you’re done, zip the completed folder and submit it to Canvas.